OAuth 2.0 Resource Server에서 JWT 토큰을 검증하고 권한을 처리하는 방법에 대해 알아보겠습니다. Spring Security를 사용하여 Resource Server를 구성하고, JWT 토큰의 scope와 roles 클레임을 권한으로 변환하는 과정을 살펴볼 것입니다. 또한, 자주 발생하는 SSL 관련 오류와 그 해결 방법에 대해서도 다룰 예정입니다.
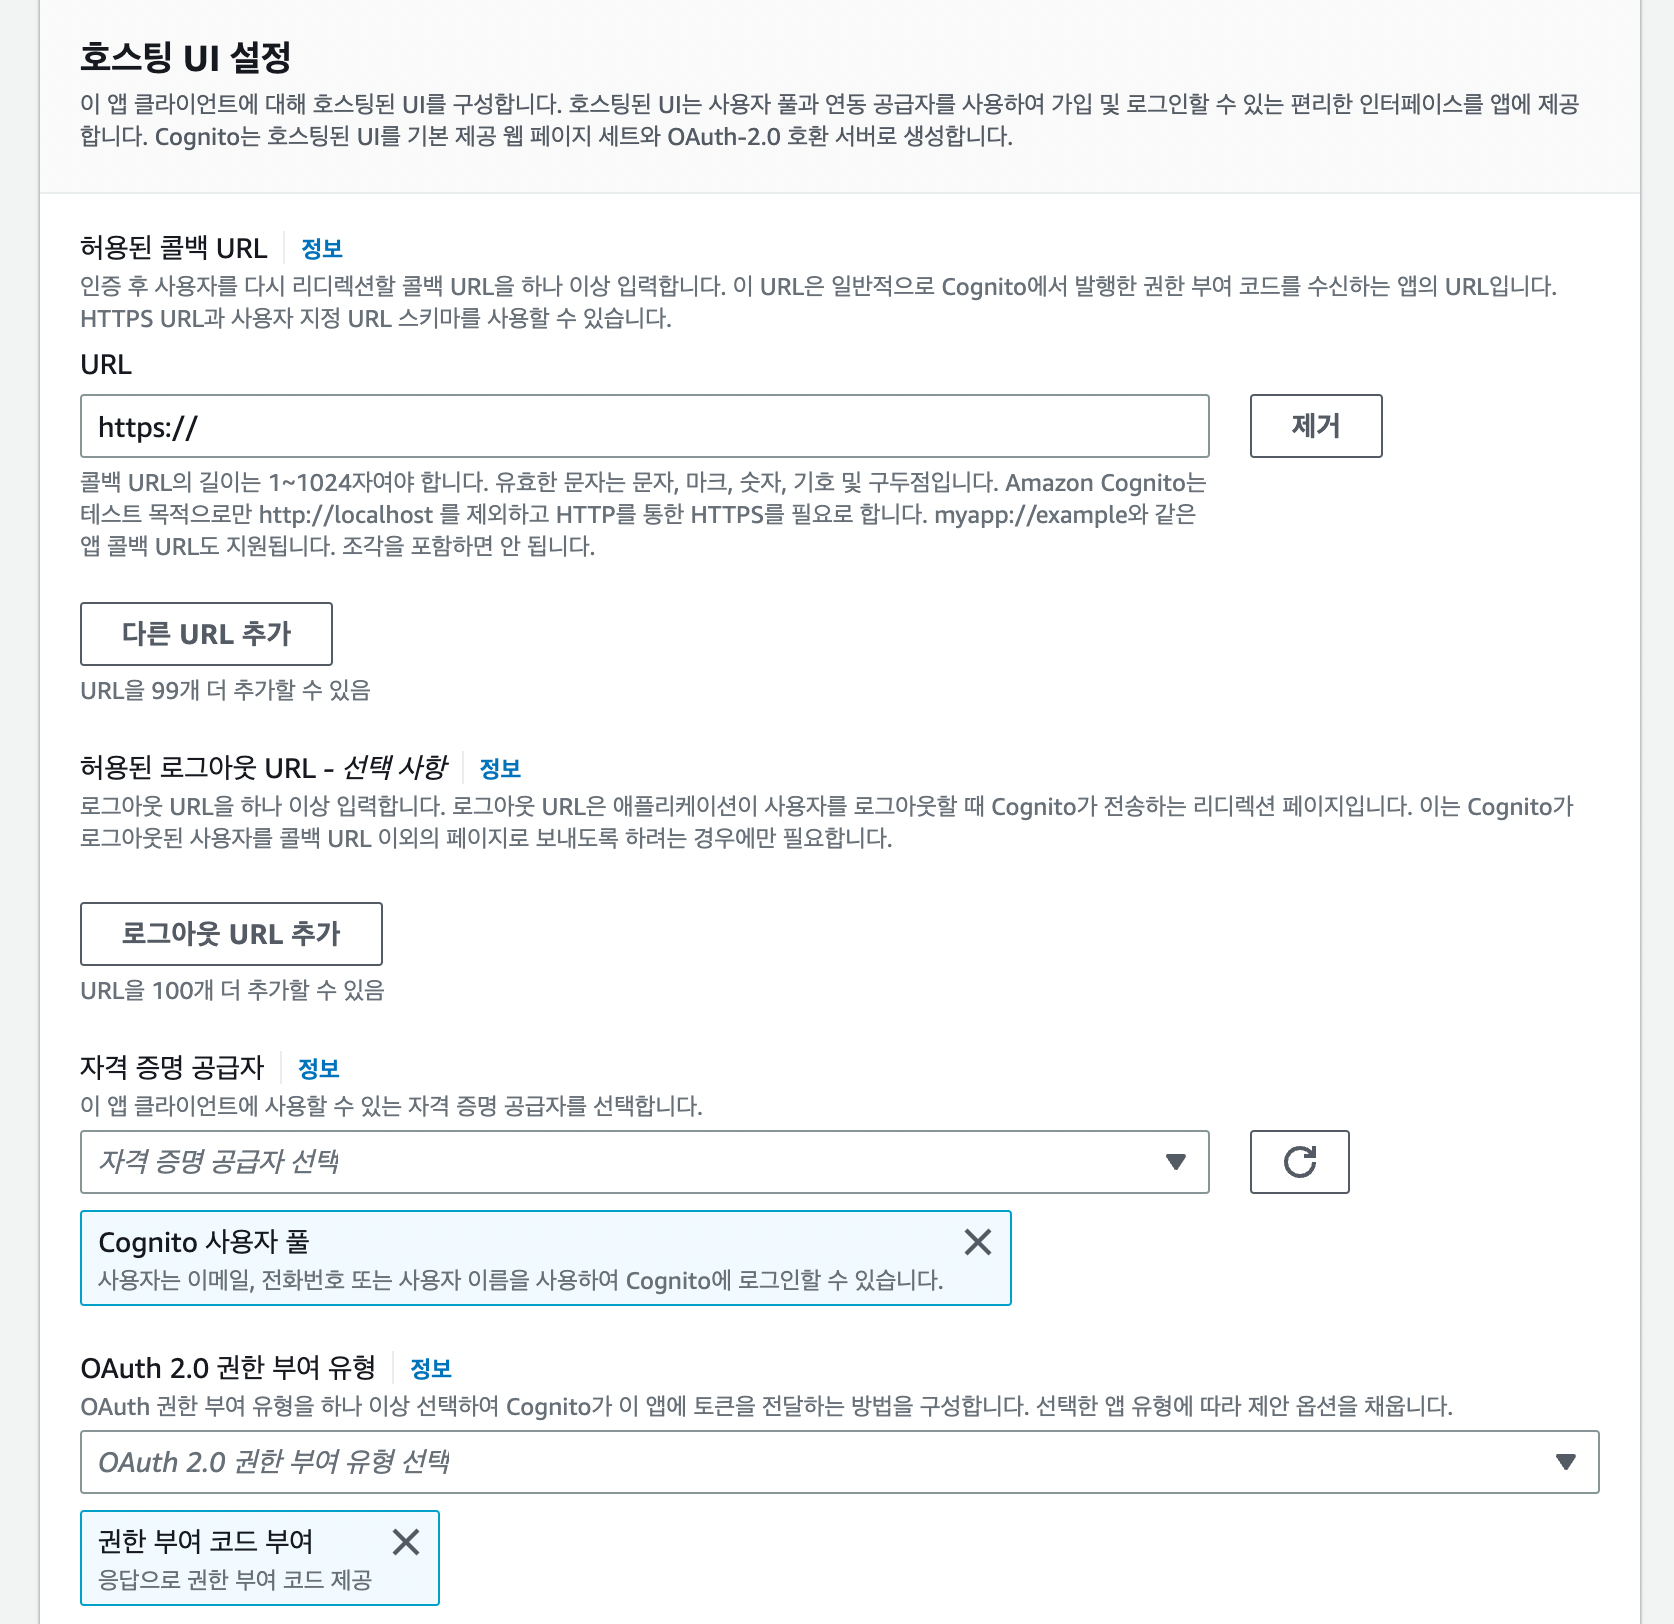
Authorization_code vs Client_credentials
OAuth 2.0의 Authorization Code 방식과 Client Credentials 방식은 서로 다른 사용 사례와 흐름을 가지고 있습니다. 두 방식의 주요 차이점은 다음과 같습니다:
- Authorization Code 방식:
- 사용자 개입이 필요한 인증 흐름
- 웹 애플리케이션이나 모바일 앱에서 주로 사용
- 리소스 소유자(사용자)의 동의를 얻어 액세스 토큰을 발급
- 보안성이 높고 refresh token을 사용할 수 있음
- Client Credentials 방식:
- 클라이언트 애플리케이션이 직접 자신의 자격 증명으로 인증
- 서버 간 통신이나 백그라운드 작업에 주로 사용
- 사용자 컨텍스트 없이 클라이언트 자체의 권한으로 액세스 토큰을 얻음
- 간단하지만 사용자 특정 데이터에 접근할 수 없음
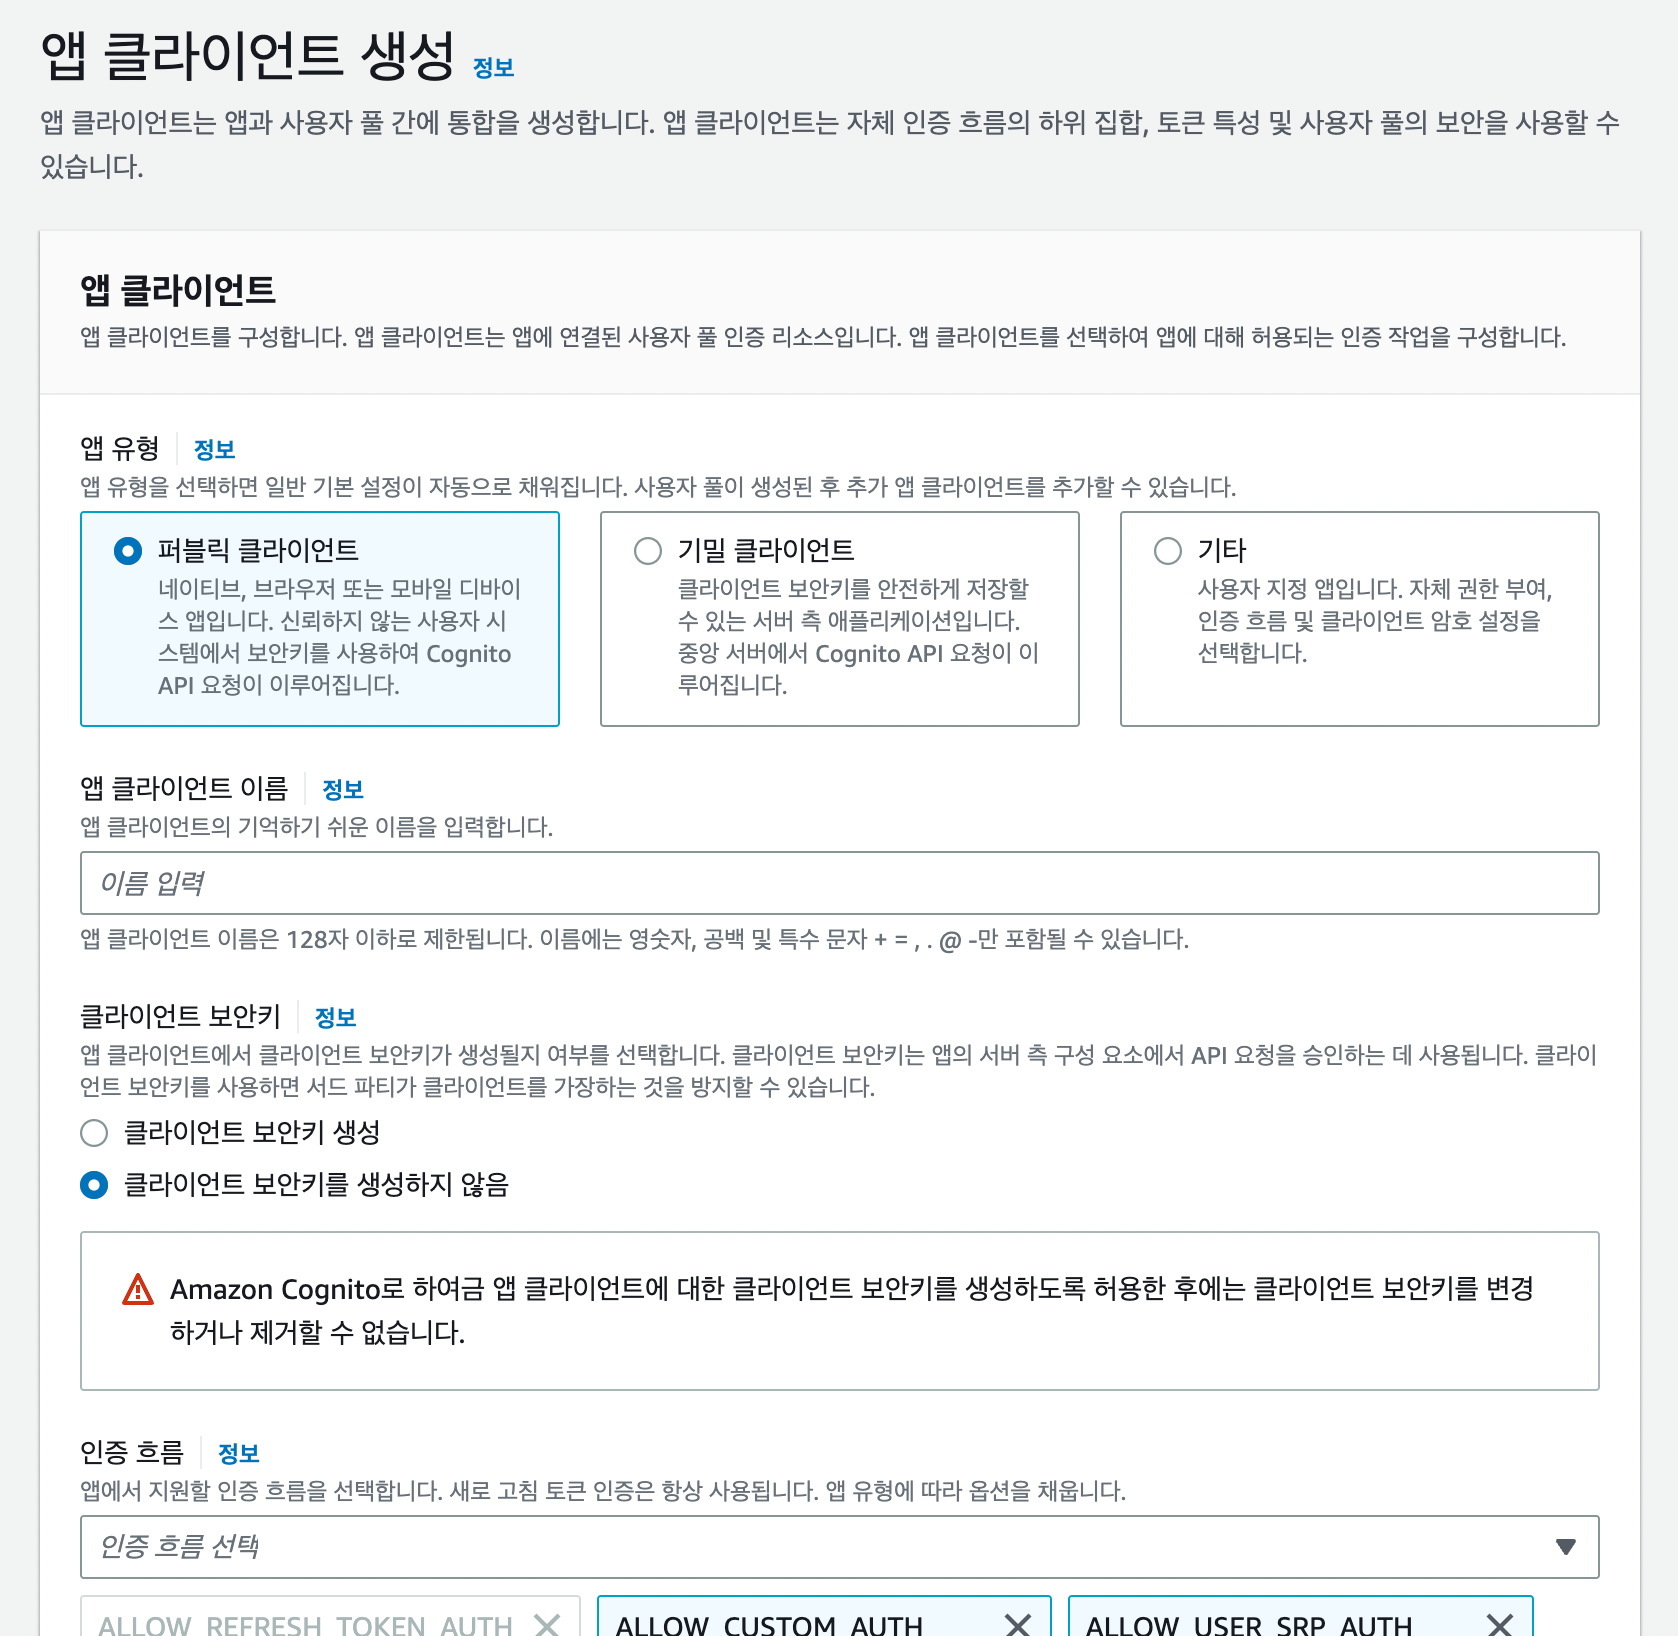
OAuth2 Authorization Server Setup
Spring Boot와 Spring Security를 사용하여 OAuth 2.0 Authorization Server를 구현하기 위해서는 다음과 같은 핵심 설정이 필요합니다:
- spring-boot-starter-oauth2-authorization-server 의존성을 추가합니다
- @EnableAuthorizationServer 어노테이션을 사용하여 OAuth 2.0 권한 부여 서버 구성을 활성화합니다
- AuthorizationServerConfigurerAdapter를 상속받는 구성 클래스를 생성하고, 클라이언트 세부 정보, 토큰 저장소, 보안 제약 조건 등을 설정합니다
- ClientDetailsServiceConfigurer를 사용하여 클라이언트 ID, 시크릿, 권한 부여 유형, 스코프 등을 정의합니다
- JWT 토큰을 사용하는 경우, JwtAccessTokenConverter와 TokenStore를 구성하여 토큰 생성 및 검증 로직을 커스터마이즈할 수 있습니다
- 사용자 인증을 위해 UserDetailsService를 구현하고, 비밀번호 인코딩을 위한 PasswordEncoder를 설정합니다
Configuring Resource Server with JWT
JWT를 사용하는 리소스 서버 구성은 Spring Security의 OAuth 2.0 지원을 통해 간단히 설정할 수 있습니다. 주요 단계는 다음과 같습니다:
- application.yml 파일에 spring.security.oauth2.resourceserver.jwt.issuer-uri 속성을 설정하여 JWT 발급자 URI를 지정합니다
- @EnableWebSecurity 어노테이션과 함께 SecurityFilterChain 빈을 구성하여 JWT 인증을 활성화합니다
- JwtDecoder 빈을 커스터마이즈하여 토큰 유효성 검사 로직을 추가할 수 있습니다
- 필요한 경우 JwtAuthenticationConverter를 구현하여 JWT 클레임을 Spring Security의 권한으로 매핑합니다
What is Scope and Role
OAuth 2.0에서 scope와 role은 접근 제어를 위한 중요한 개념이지만, 그 용도와 적용 방식에 차이가 있습니다:
- Scope: 클라이언트 애플리케이션이 사용자 리소스에 접근할 수 있는 범위를 정의합니다. 예를 들어, 'read:profile', 'write:email' 등으로 세분화된 권한을 나타냅니다.
- Scope는 OAuth 2.0 프로토콜의 표준 부분으로, 인증 서버에서 관리됩니다.
- Role: 사용자의 조직 내 역할이나 권한 수준을 나타냅니다. 예를 들어, 'admin', 'user', 'manager' 등이 있을 수 있습니다
- Role은 주로 애플리케이션 내부에서 정의되고 관리됩니다.
- Scope는 클라이언트 애플리케이션의 권한을 제한하는 데 사용합니다. 예: 'read:books'
- Role은 사용자의 전반적인 권한 수준을 정의하는 데 사용합니다. 예: 'librarian'
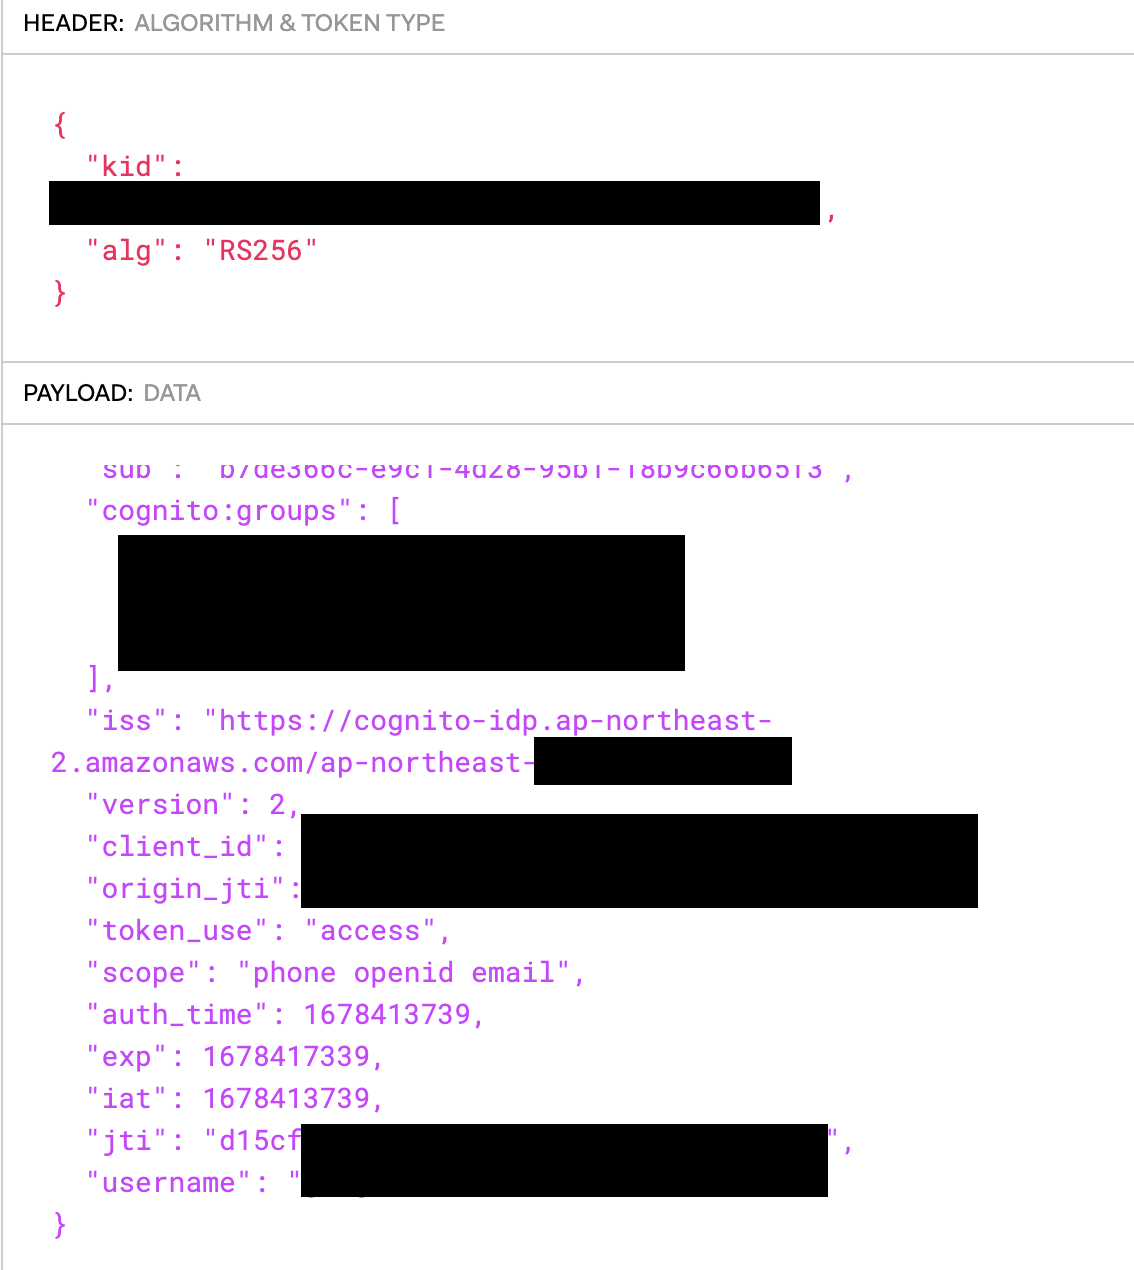
Handling Roles and Scopes in Tokens
OAuth 2.0 토큰에서 역할(roles)과 범위(scopes)를 처리하는 것은 리소스 서버의 중요한 기능입니다. Spring Security에서는 JwtAuthenticationConverter를 사용하여 이를 구현할 수 있습니다:
- JWT 토큰의 'scope' 클레임을 Spring Security의 권한으로 자동 변환합니다.
- 커스텀 'roles' 클레임을 처리하려면 JwtAuthenticationConverter를 확장하여 구현합니다.
- GrantedAuthoritiesMapper를 사용하여 클레임을 세분화된 권한으로 매핑할 수 있습니다.
- 보안 구성에서 @PreAuthorize 또는 hasRole() 메소드를 사용하여 엔드포인트별 권한을 설정합니다.
Customizing Token Claims
JWT 토큰의 클레임을 커스터마이즈하는 것은 OAuth 2.0 인증 서버에서 중요한 기능입니다. Spring Security에서는 OAuth2TokenCustomizer 인터페이스를 구현하여 이를 수행할 수 있습니다
- @Bean 메서드를 통해 OAuth2TokenCustomizer를 구현합니다.
- customize 메서드 내에서 context.getClaims()를 사용하여 JWT 클레임에 접근합니다.
- claims.put() 메서드로 커스텀 클레임을 추가하거나 기존 클레임을 수정합니다.
- 사용자의 권한이나 역할을 클레임으로 추가하려면 context.getPrincipal()에서 정보를 추출합니다
이 방법을 통해 리소스 소유자의 추가 정보나 애플리케이션 특정 데이터를 토큰에 포함시킬 수 있어, 리소스 서버에서 더 세밀한 접근 제어가 가능해집니다.
Resolving Errors
OAuth 2.0 구현 시 JwtDecoder와 SSL 관련 오류를 해결하는 방법은 다음과 같습니다:
- JwtDecoder 오류: NimbusJwtDecoder.withJwkSetUri()를 사용하여 JWK Set URI를 명시적으로 설정합니다.
- 이때 URI가 올바른지 확인하고, 필요한 경우 커스텀 RestTemplate을 구성하여 추가적인 헤더나 인증을 처리할 수 있습니다.
- SSL 인증서 오류: 개발 환경에서는 server.ssl.key-store-type=PKCS12와 server.ssl.key-store=classpath:keystore.p12를 설정하여 자체 서명된 인증서를 사용할 수 있습니다.
- 프로덕션 환경에서는 신뢰할 수 있는 인증 기관에서 발급한 유효한 SSL 인증서를 사용해야 합니다.
Setting Up JWK URI for Validation
- application.yml 파일에 spring.security.oauth2.resourceserver.jwt.jwk-set-uri 속성을 추가합니다. 이 URI는 일반적으로 https:///.well-known/jwks.json 형식을 따릅니다.
- 보안 구성 클래스에서 JwtDecoder 빈을 커스터마이즈하여 JWK URI를 명시적으로 설정할 수 있습니다
- JWT 토큰 검증을 위한 JWK (JSON Web Key) URI 설정은 OAuth 2.0 리소스 서버 구현의 중요한 부분입니다.
'Software Architecture' 카테고리의 다른 글
| AWS 데이터베이스 비용비교 (DynamoDB vs RDS) (0) | 2024.12.19 |
|---|---|
| Spring 기반의 Layer별 테스트케이스 작성 가이드 (0) | 2024.04.03 |
| (콘웨이법칙)커뮤니케이션 구조가 소프트웨어의 구조를 결정한다. (1) | 2023.04.13 |
| OAuth 2.0 Flow (0) | 2023.03.03 |
| Designing Data-Intensive Applications - The Trouble with Distributed Systems #2 (0) | 2023.01.19 |